Have you ever wanted to create your own 3D modeling scene but felt intimidated by all the grunt work that comes with starting from scratch? Well, with Magic Poser, the hard part is already done; you just have to decide on a scene, add the props, and customize them to your liking. How? Keep reading and we'll tell you.
What Are Props in Magic Poser?
Props in Magic Poser are objects and environments that can be added to the scene to complement the models and make the scene appear more realistic.
In this tutorial, we are using the iOS version of Magic Poser with a Master subscription. Please note that Free, Pro, and Master include different content, but all basic functions are available for the Free version.
Types of Props
There are eleven prop subsections for you to choose from. They include:
- Geometry
- Weapons
- Furniture
- Nature
- Transportation
- Architecture
- Environments
- Food & drink
- Technology
- Accessories
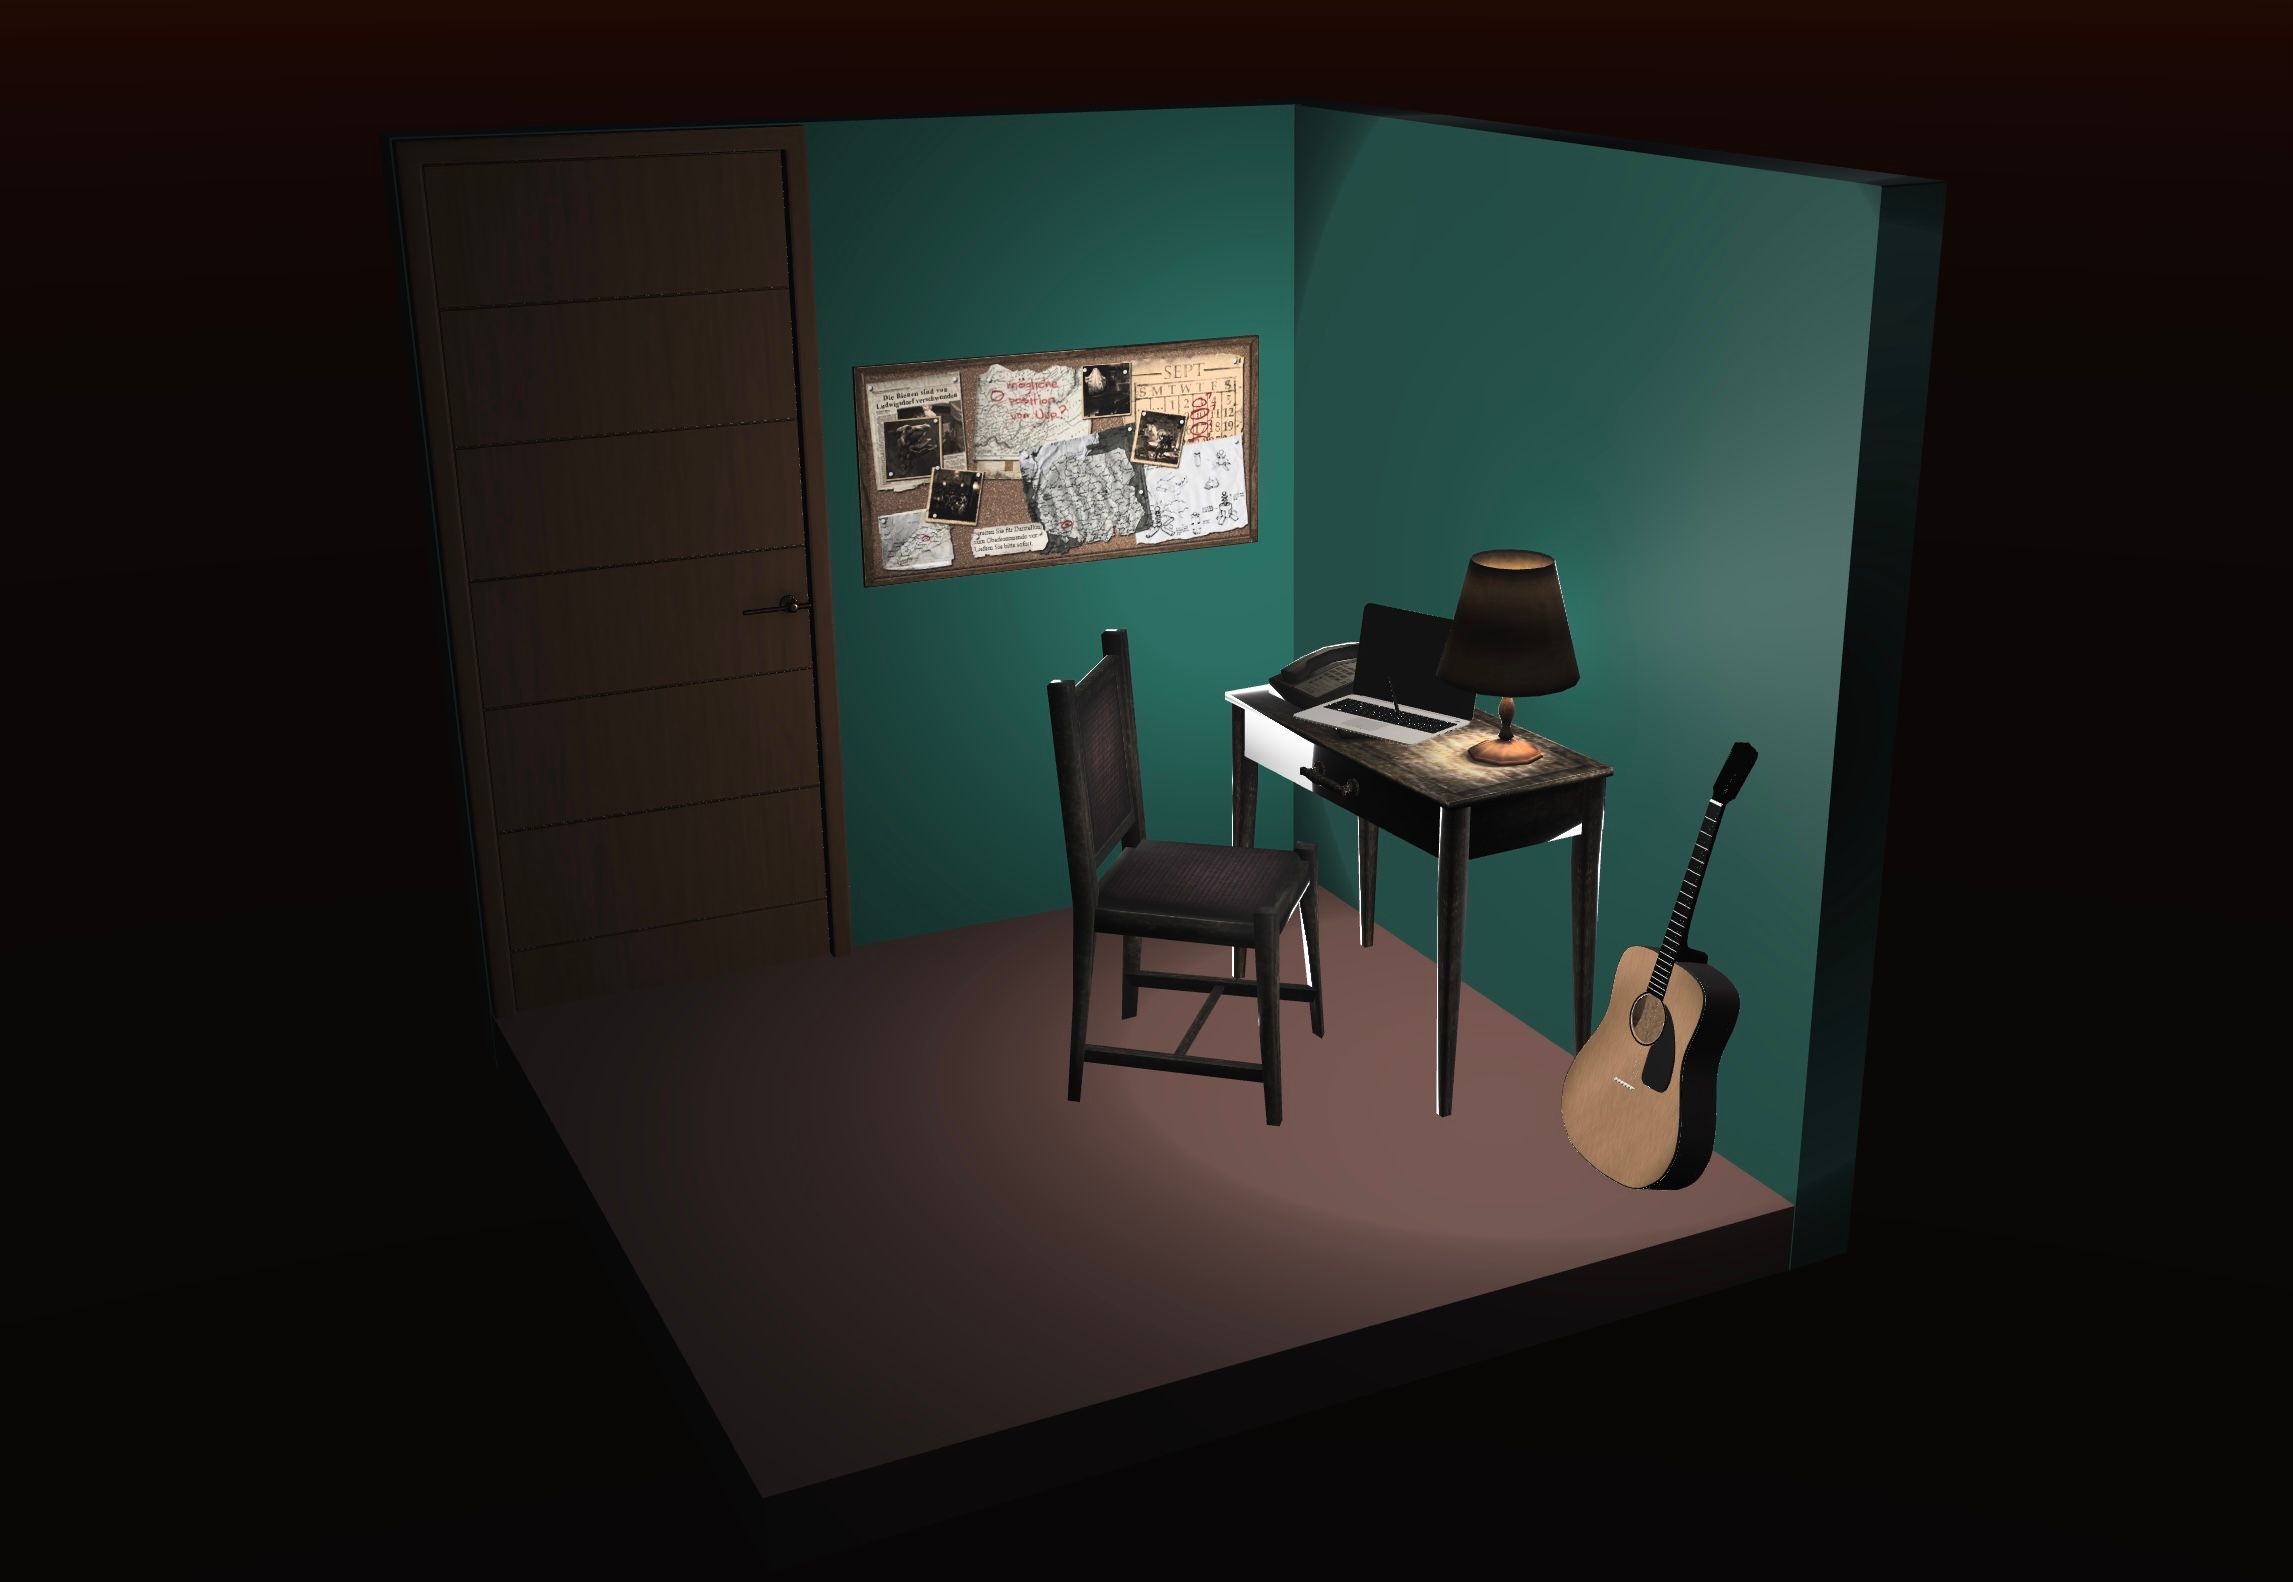
Geometry is a section with basic shapes, such as rectangles and cylinders. This is great if you want to get creative and design your own props. For example, take a look at the image below where wall is used for the walls and ground of the room, but other more advanced props are added to complement the scene.
If you're someone who enjoys the beginning phases of creation, then have a look at our beginner's guide to starting 3D modeling.
How to Add Props to a Scene
Adding props to a scene is easy. All you have to do is follow these steps:
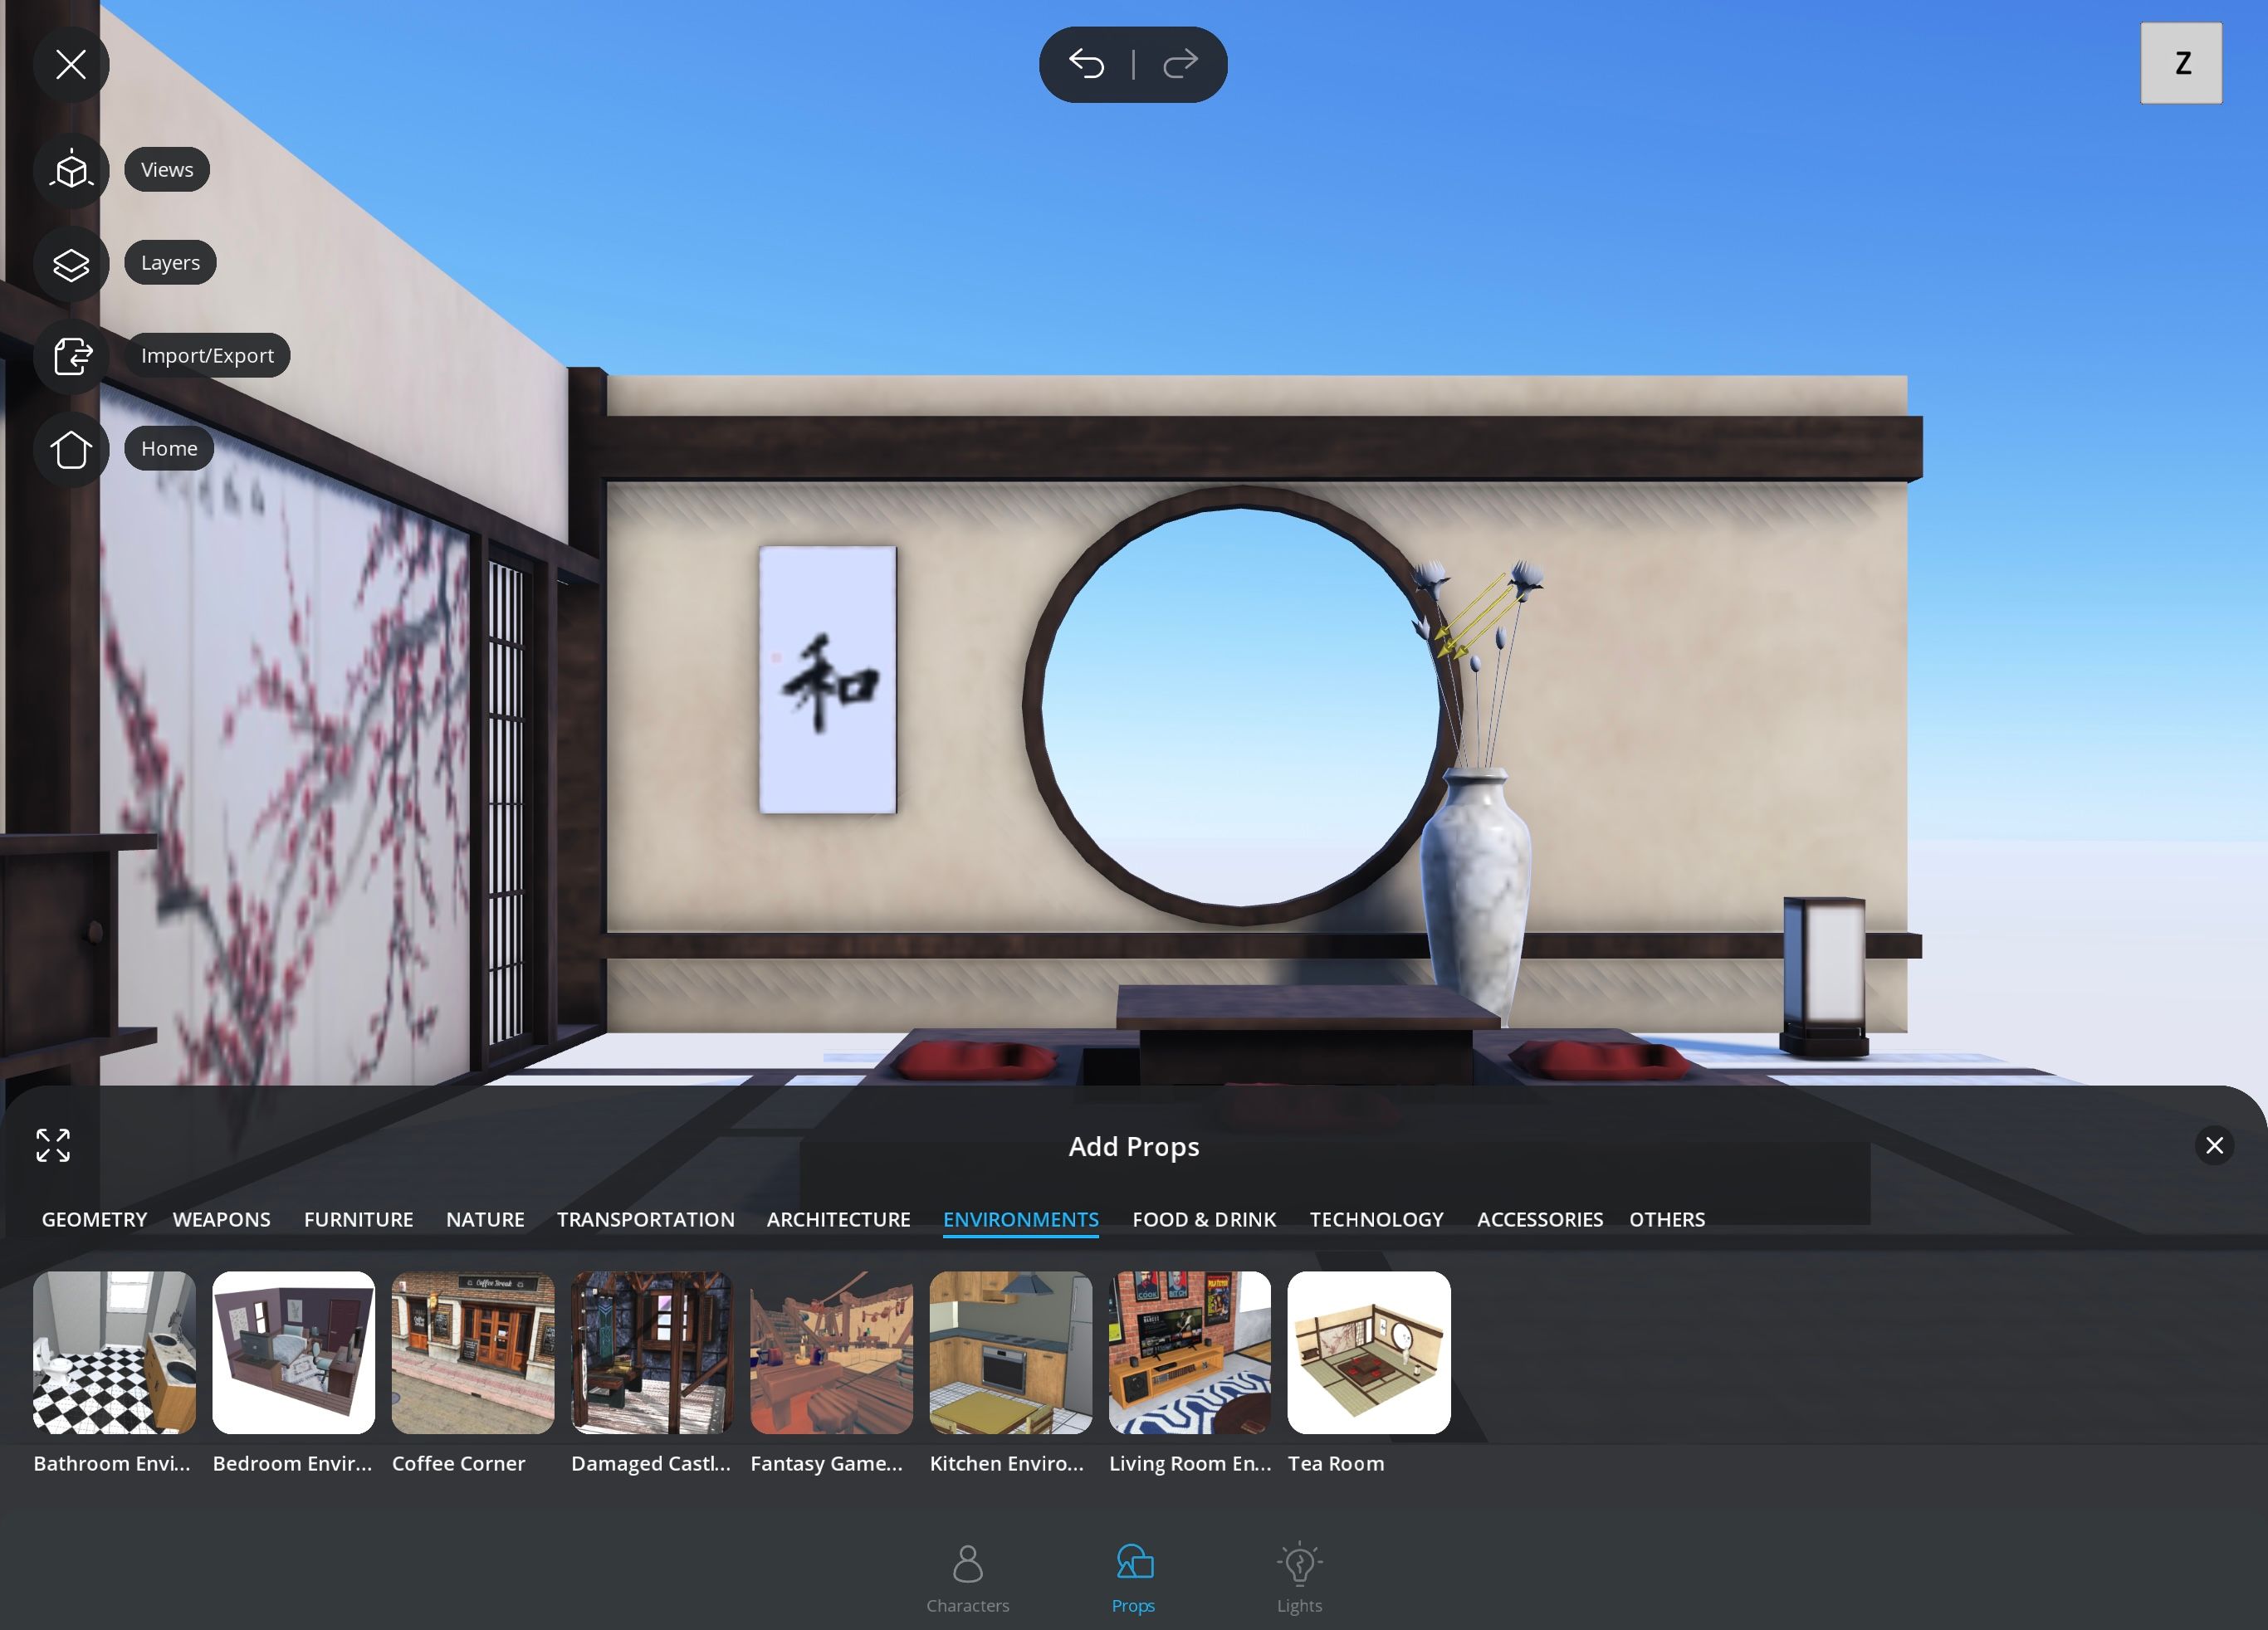
- Tap the plus sign in the bottom right corner of the screen.
- Look for Props on the menu that appears at the bottom and tap it.
- You can either swipe through the subsections or tap on the four arrows in the upper-left corner of the menu to expand it to full screen.
- Once you find a prop you like, tap on the picture, and it will either add it to the scene or download the prop if it has not been previously downloaded.
- If one tap only downloaded the prop, tap it again to add.
The prop will be added to the scene in the center of the grid where you can now reposition it and customize it.
Rescaling Your Props
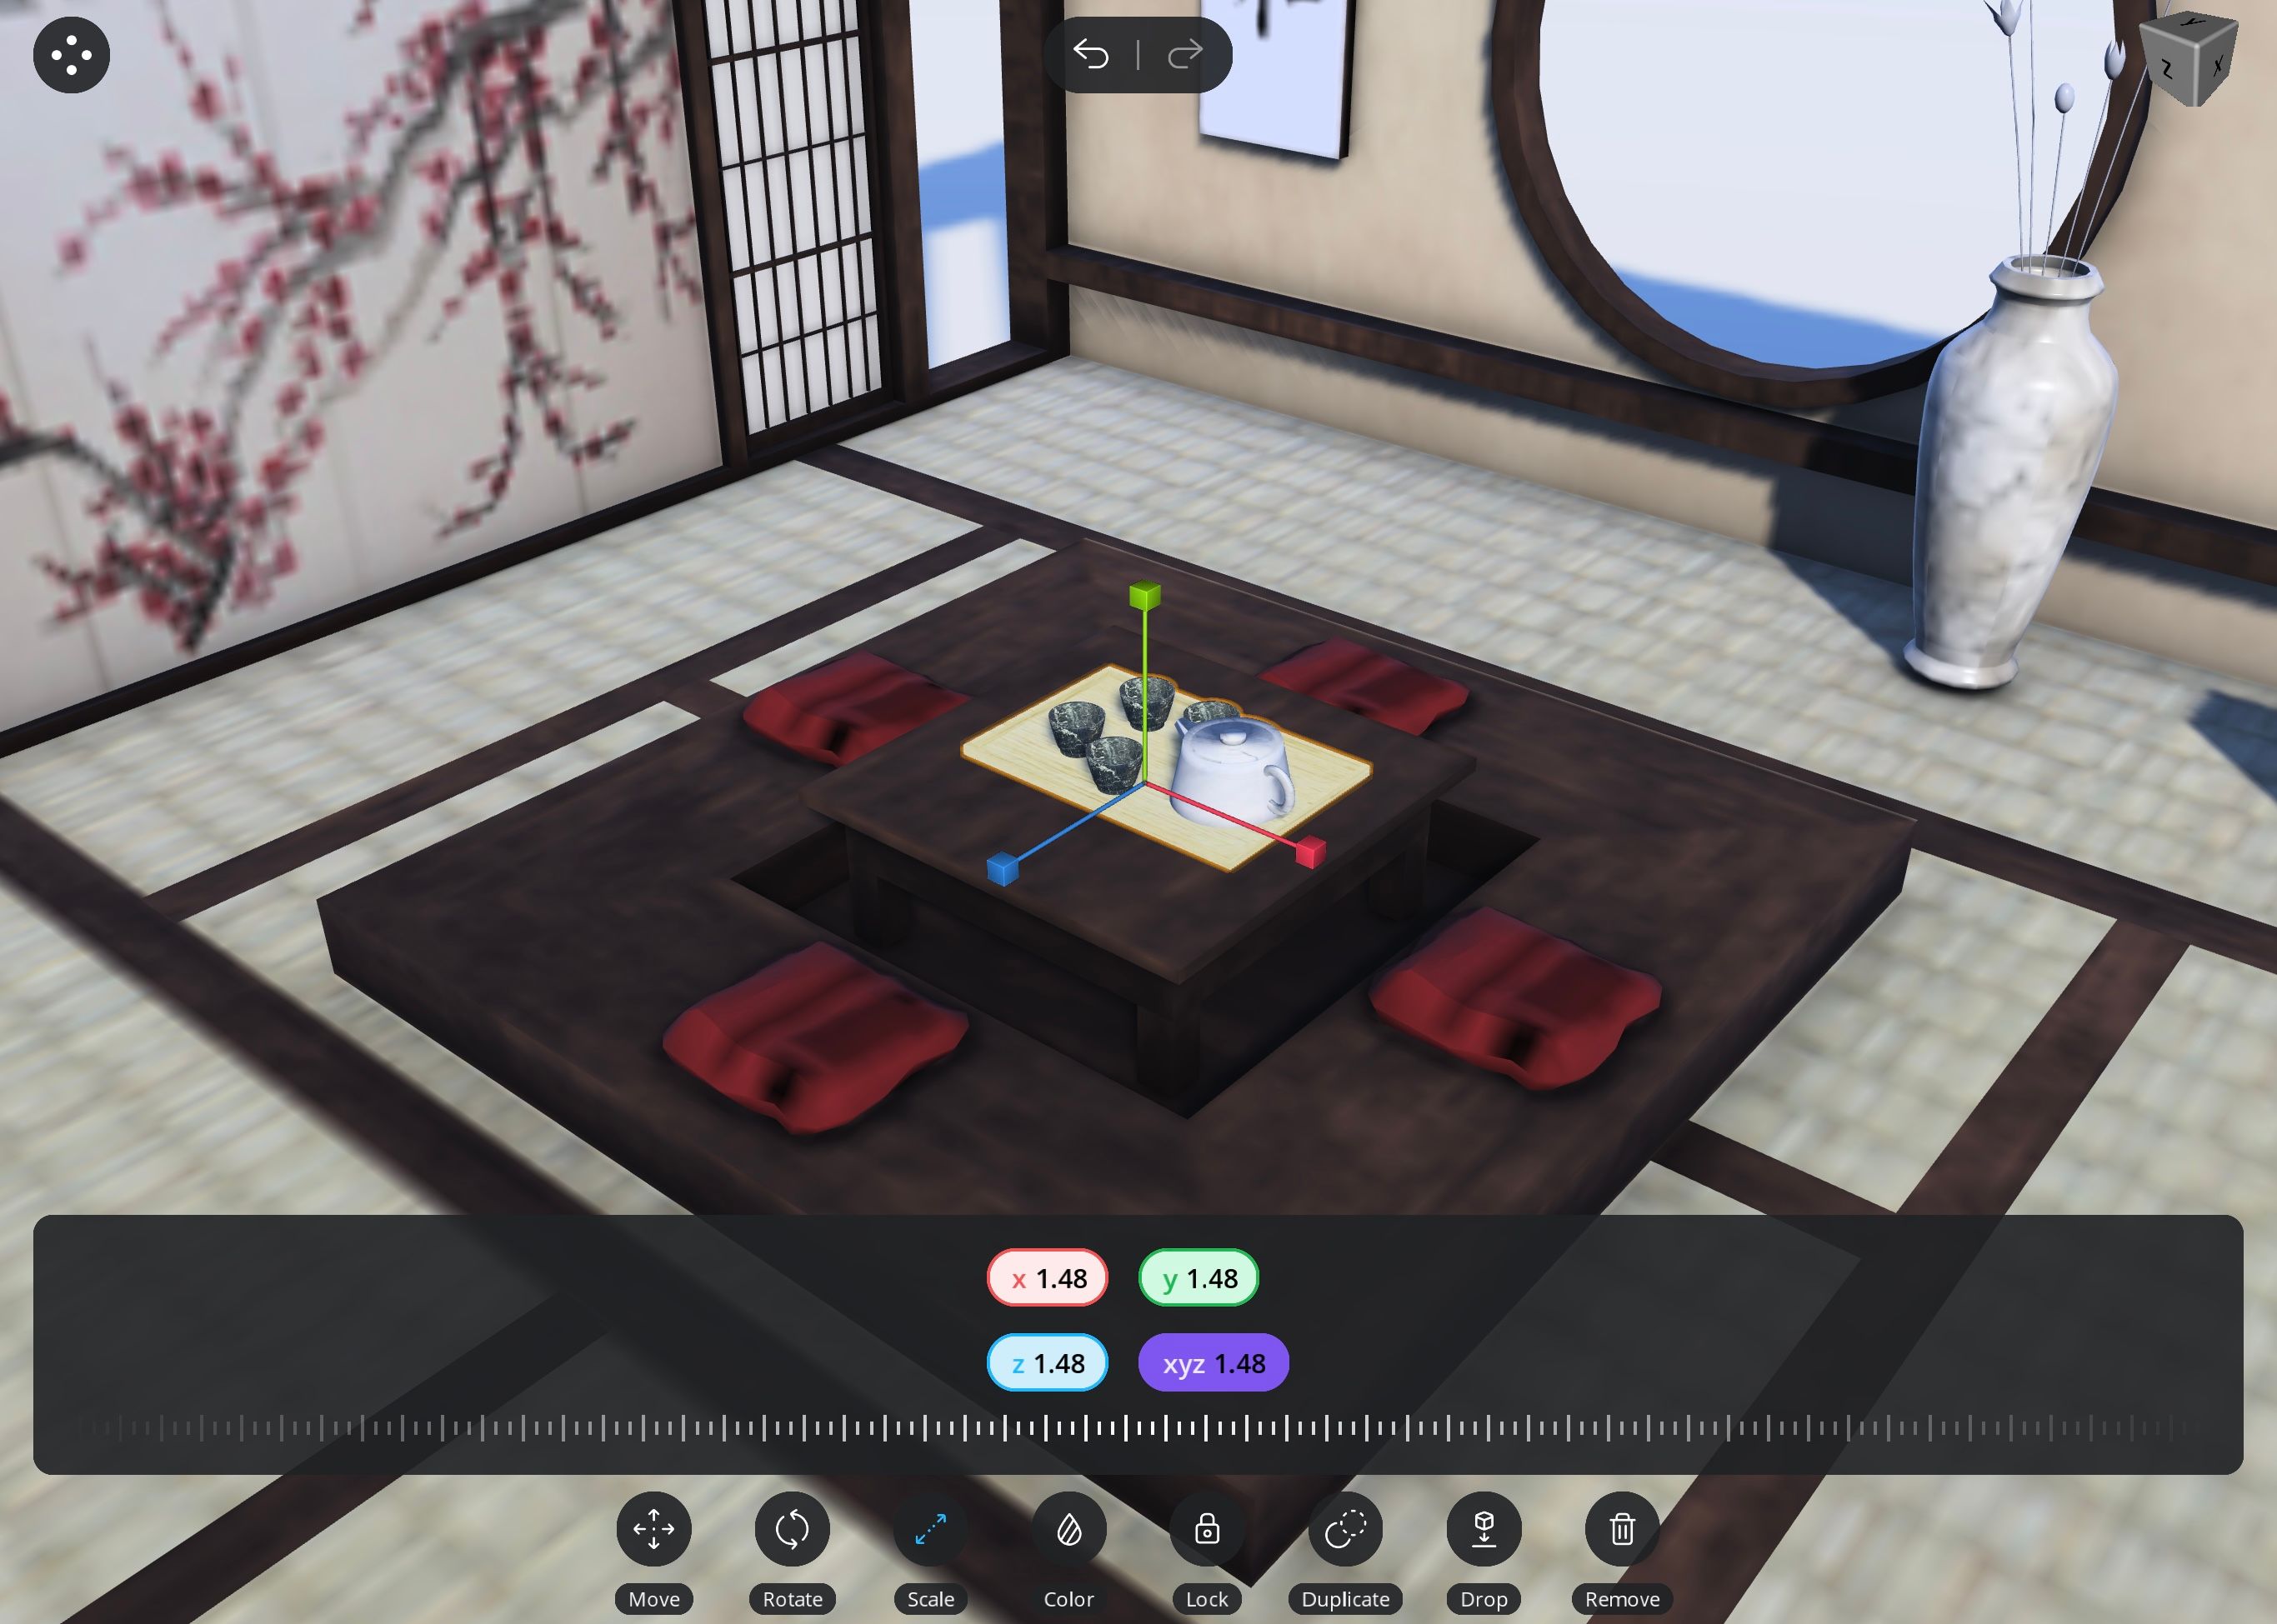
Props can be scaled down and up so that they are proportionate to the other props and models in the scene.
To rescale your props, you have to follow these steps:
- Select your prop by tapping anywhere on the object. The prop should be highlighted.
- In the menu that pops up at the bottom of the screen, tap Scale.
- Tap on the x, y, or z (or the XYZ if you wish to scale all three axes simultaneously) and drag the slider left or right to scale the prop larger or smaller, wider or longer.
Colorizing Your Props
Props can also be colorized. However, while the color of some objects can be modified entirely, others will only change in hue or brightness.
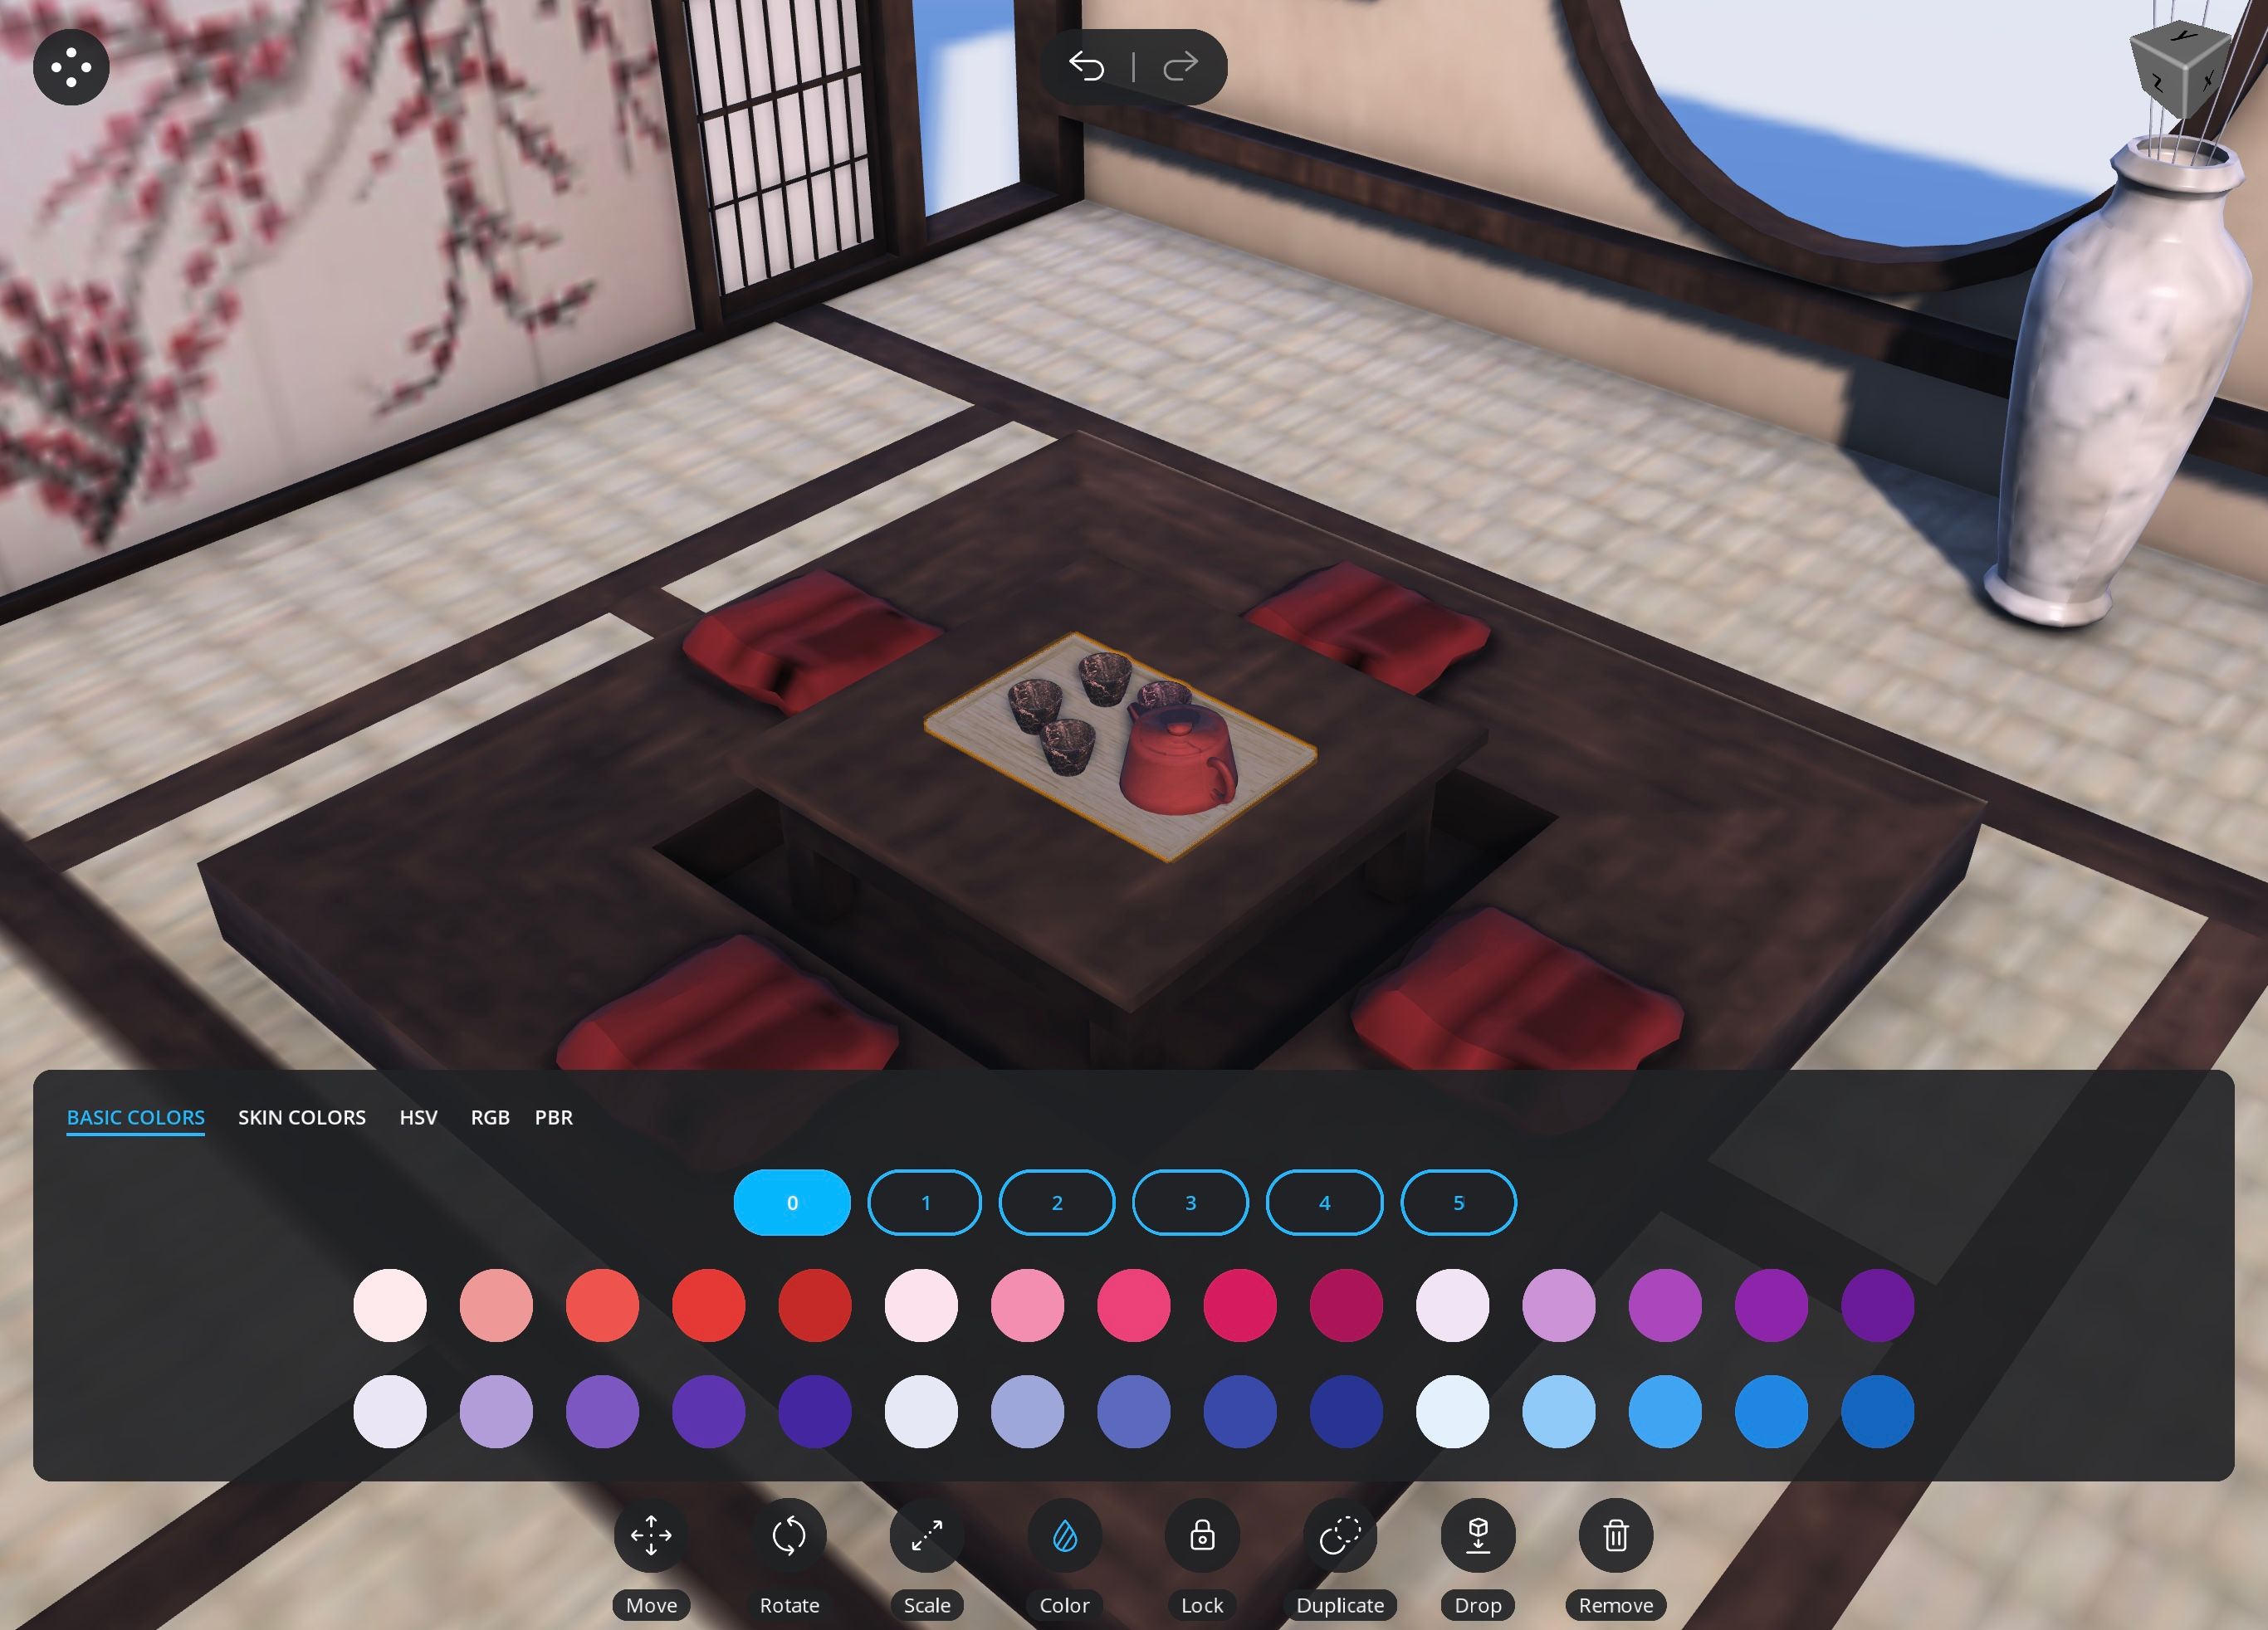
The original color, the texture of the object, and the highlights and shadows determine to what extent an object can be colorized. For example, the teapot and tray easily change color, but only the highlights in the teacups change.
To colorize your props:
- Tap on the prop so that it is highlighted.
- Tap the Colorize option in the pop-up menu below.
- Some props have various elements that can be customized individually, while others have only one. If yours is the former, tap the different numbers to discover what specific object goes with what number (the object will be highlighted).
- Scroll through the available colors and choose which one you like by tapping on the circle of color.
- If you want to adjust the HSV, RGB, or PBR, you can tap those headings and refine the color as much as you need.
Repositioning Your Props
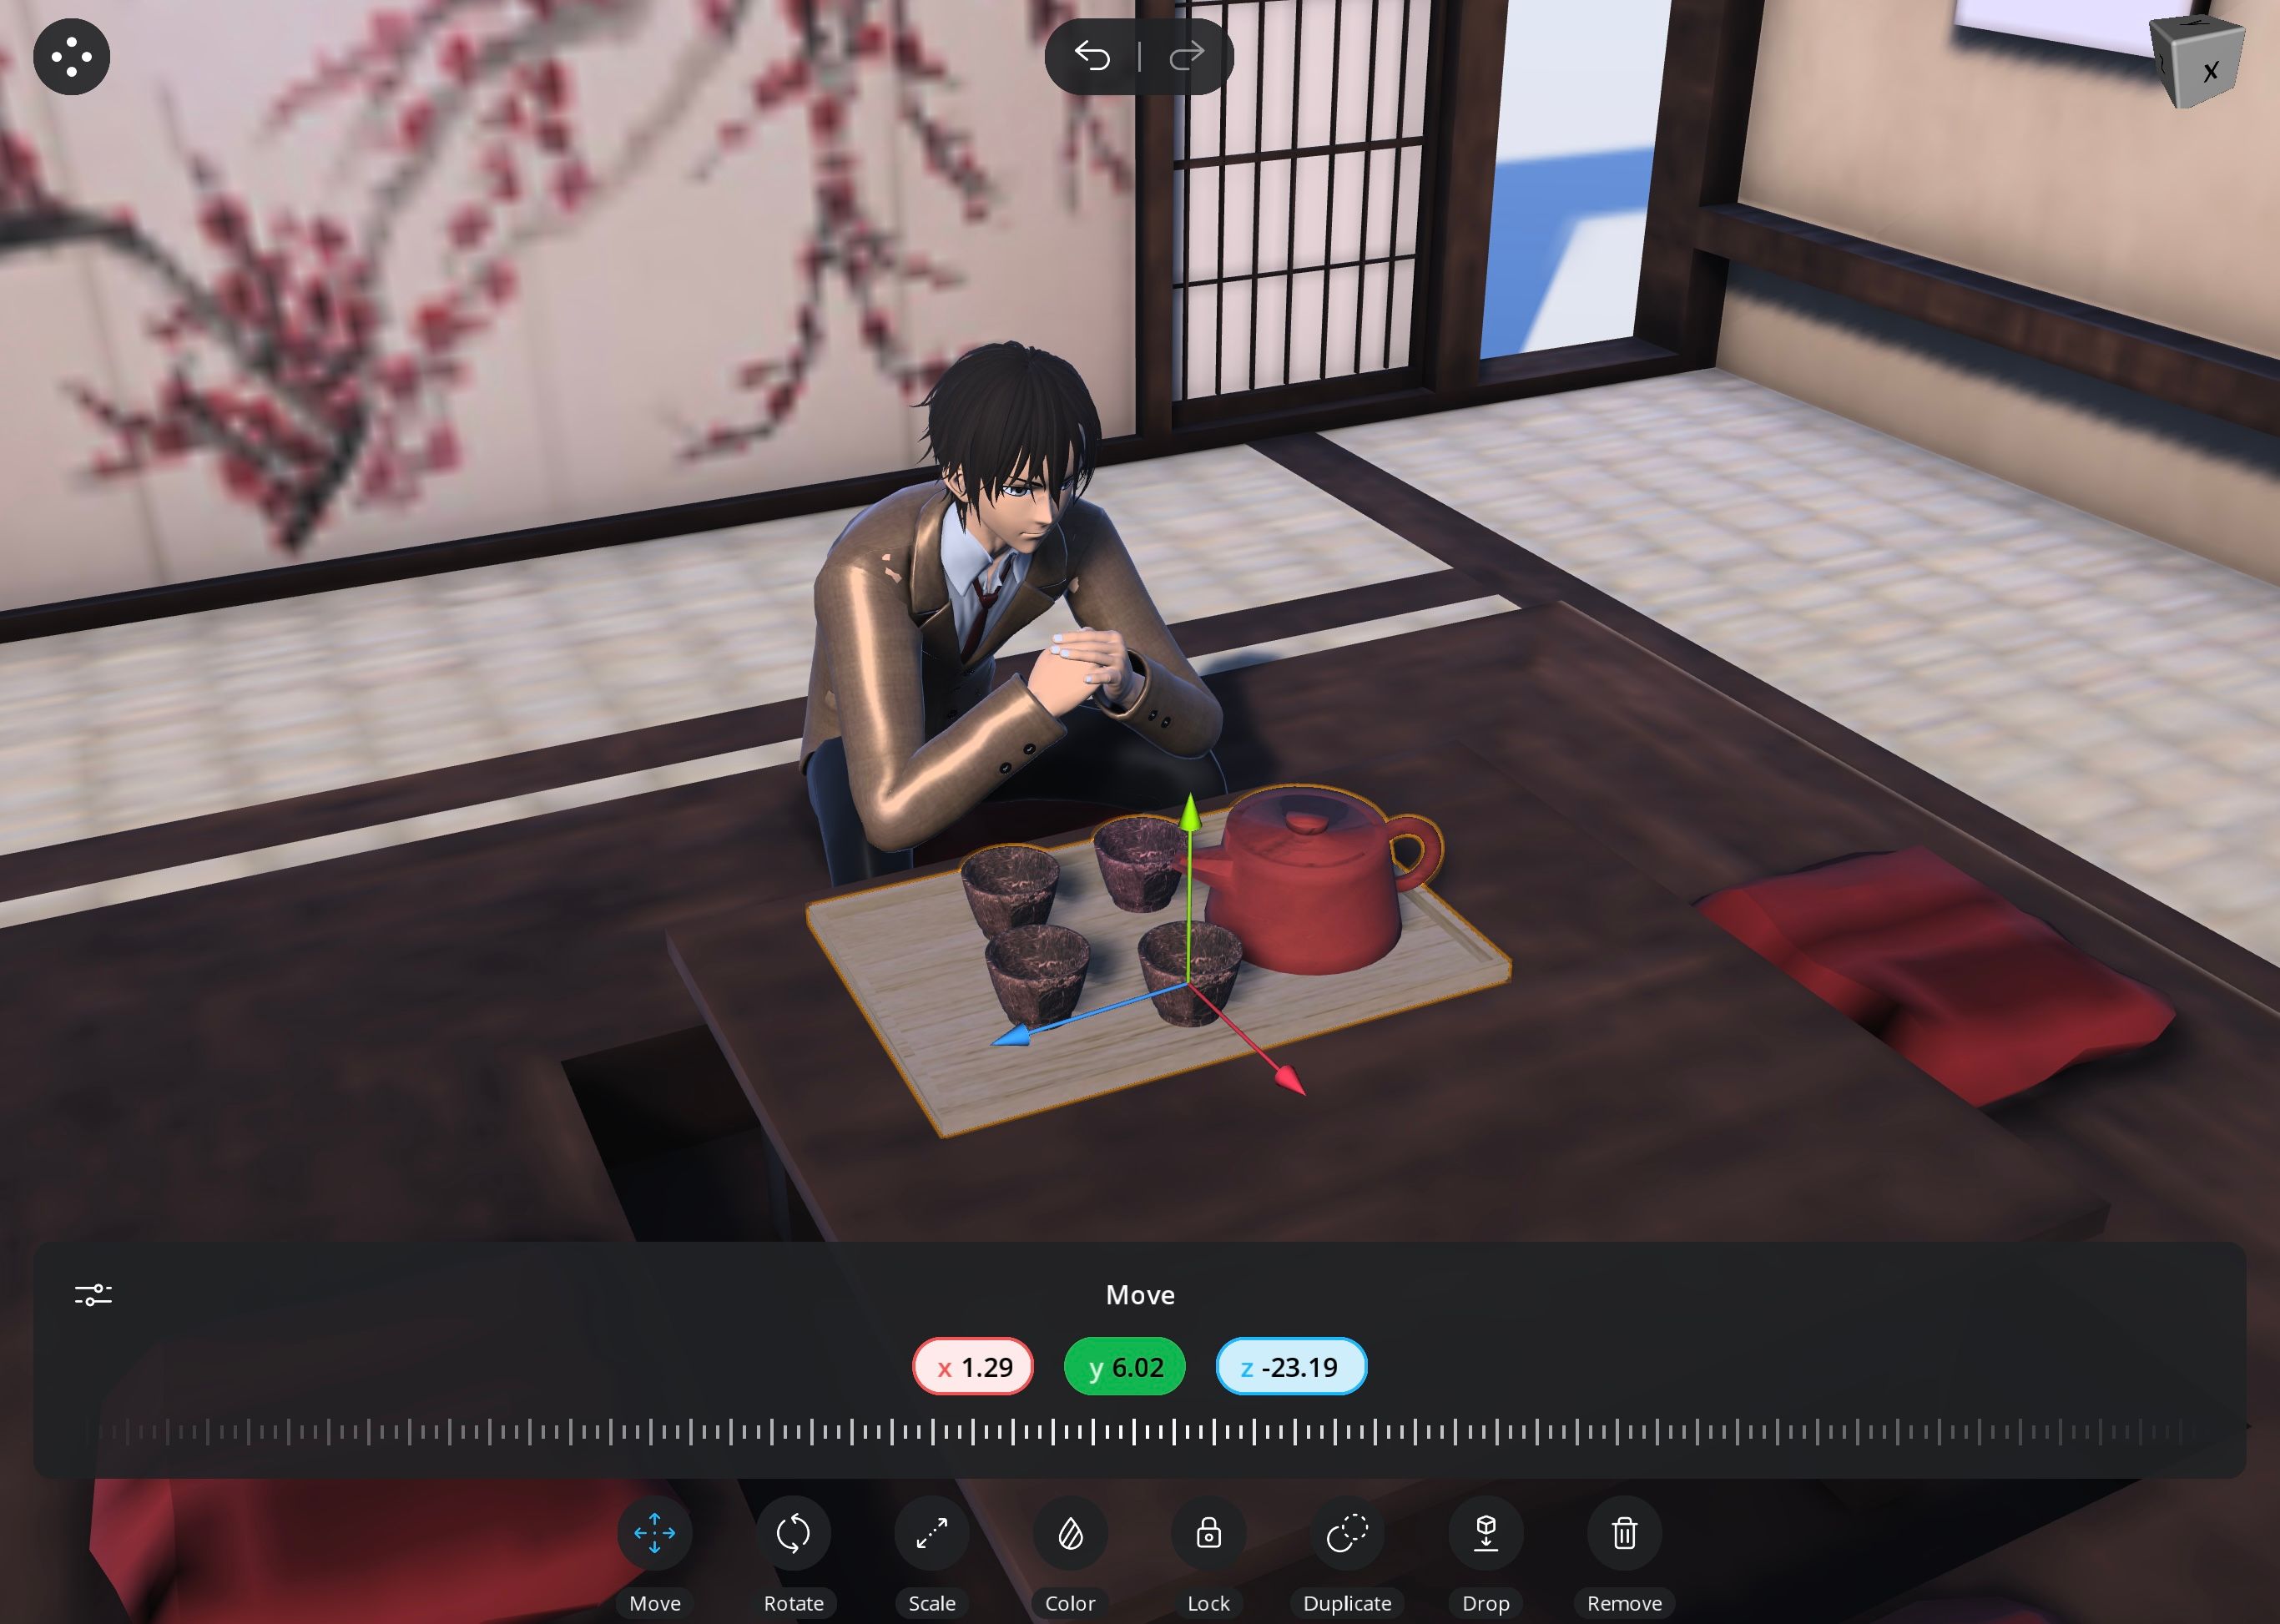
Every new prop that you add is automatically added at the center of the grid, so you will need to reposition it along the XYZ axis. To do this:
- Highlight the object by tapping on it.
- Tap Move in the menu at the bottom.
- Notice which direction the colored arrows point, and then match the color to the specific axis. For example, x is in red, so it moves in the direction where the red arrow points. Move the slider to get the object into position.
Once you've completed these steps, you're finished with adding props. But if you have any models in the scene, or if you want to add a model, yet you're unsure of how to position them, then check out the different ways you can pose a model in Magic Poser.
Make a Scene
Using props in Magic Poser is essential because they provide the framework; they elevate the atmosphere and convey intent, which could easily be lost otherwise. So don't hold back on the details, put in that extra effort and make a scene with your props.
"Scene" - Google News
July 22, 2022 at 04:00AM
https://ift.tt/uzFryHN
How to Create a Scene Using Props in Magic Poser - MUO - MakeUseOf
"Scene" - Google News
https://ift.tt/WEzGL3h
Shoes Man Tutorial
Pos News Update
Meme Update
Korean Entertainment News
Japan News Update
No comments:
Post a Comment